Whether you’re running a salon, yoga studio, or medical clinic, this template is packed with tools to streamline your operations and offer a seamless experience to your clients.
SmartTimely supports multi-staff functionality, allowing you to manage team members from different locations. Setting up staff is simple and efficient.
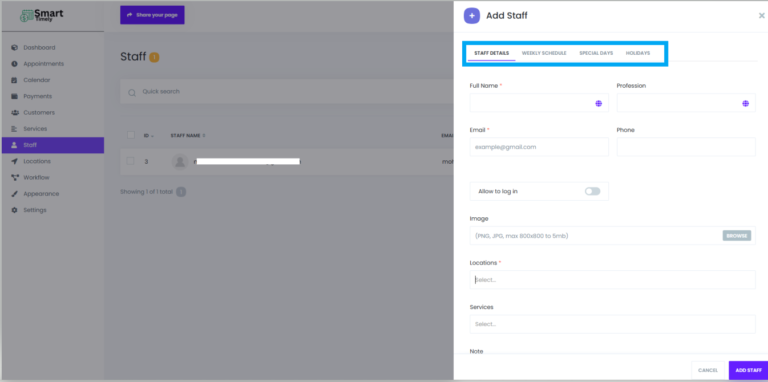
How to Add a New Staff Member:
Click on ADD STAFF to create a new staff profile.
A window with four tabs will appear:
DETAILS: Add essential information like staff name, contact details, and assigned location.
WEEKLY SCHEDULE: Define the staff member’s working hours for each day of the week.
SPECIAL DAYS: Add unique availability or special schedules for particular days.
HOLIDAYS: Specify days when the staff member will not be available.
By organizing your team with these settings, you ensure efficient booking and avoid scheduling conflicts.
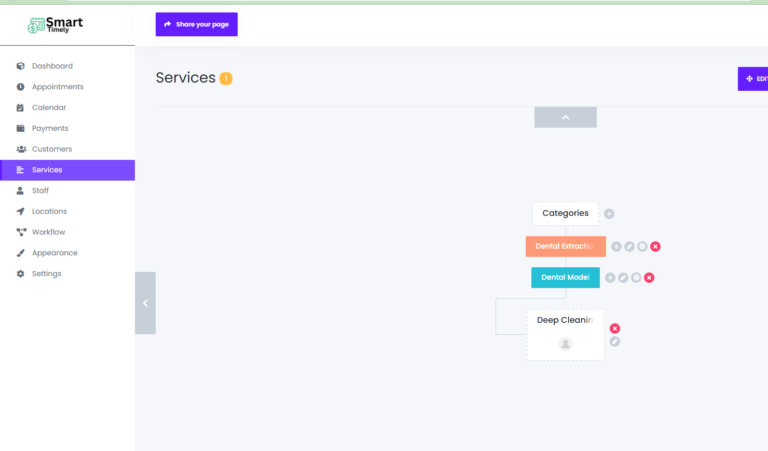
Services Section
Before setting up services, you need to create a category for them.
Steps to Create a Category:
Navigate to the Services section.
Click the “+” icon next to Categories in the middle of the screen.
Enter the name of your new category and click the Save icon.
Once the category is created, you can start adding specific services to it. Repeat the process to organize all your services effectively.
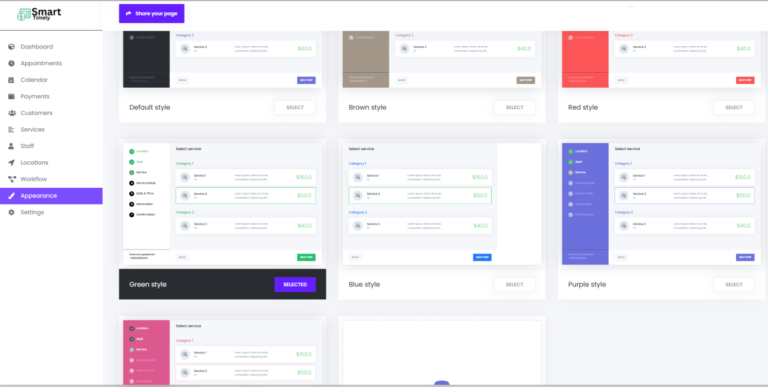
Appearance of the Booking Widget
Design the SmartTimely booking panel to match your brand colors and style.
Customization Options:
Choose from seven pre-designed styles: Default, Brown, Red, Green, Blue, Purple, and Pink.
To apply a style:
Select your desired style.
Click the CHOOSE button to preview and apply the look.
For advanced customization, create a new template from scratch to suit your branding needs.
With these options, your booking widget will align perfectly with your business’s visual identity.
Group Appointment
SmartTimely allows you to configure services as group appointments or limit them to one person per booking.
How to Set Up Group Appointments:
Go to the Service Settings section.
Enable the Group Appointment option.
Set a limit for the maximum number of participants.
This feature is especially useful for businesses like yoga studios, salons, or doctors hosting group sessions or classes.